Been busy, oh so busy teaching myself new tricks… Pictures with few words today.
(Click the first picture for gallery and captions)
-
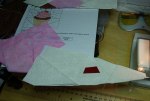
- That moment when…
-
- Your realize that…
-
- It should have been pink!
-
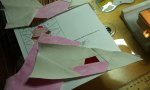
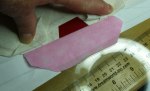
- Ahh, that’s better!
-
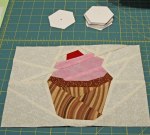
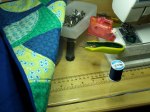
- Done and on to quilting it.
-
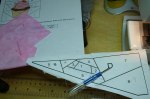
- Curved seams (aka: Drunkard’s Path)
-
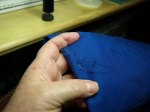
- Many tiny stitches.
-
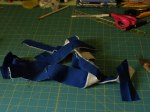
- All that is left of the fabric from the apron you made for Julie and used up in this learning project. ‘-)
NOTES: The curved seam practice went not so well, but it was a good learning experience and made a cute little mat for the kitchen table. It now holds the napkins, salt and pepper.
So what are the little hexagon shapes in the picture of the finished cupcake? Why my next learning exercise of course! 😉
Julie’s apron is HERE

Have always admired the patience it must take for each and every project like this. What fun!
It is fun, Annie! It was hard for me to get started, but I now realize that practice is just that, PRACTICE, and it will never be a good work without it. Besides, the failures are good enough for use around the house. 😀
Bravo to you! What I love most is you sound so excited and happy trying some new tricks! You are a very talented seamstress, Lynda. I’m confident you’ll have this whipped in no time!
Thank you for your vote of confidence in my work, Lori. I must admit that I gave up on the compass and freezer paper method for building the drunkard’s path project (the one in greens and blues). I broke down and ordered the templates so that when I cut the parts the will be more standard in form. I am certain that will help me a bunch! 🙂 And by the way, the work I did on your grandmother’s quilts actually helped me on a project of my own! It was great to look at the problem I was having and to know that I already knew how to fix it! 🙂
Woo hoo, paper piecing here you come! I can’t recommend strongly enough investing in a small LED light box; mine lives permanently on my worktable because I use it so much. There are lots of tips I can pass on if you’re interested, small things that make life a bit easier?
Yes Please! I need all the help I can get, Kate. Thankfully, I do have a light box I got years ago for card making. I used it on the Cupcake FPP project. It isn’t LED, but I’m sure there are replacement bulbs that would work when the one I have dies. I used it to see if my fabric was covering by at least a 1/4 inch. It was SO helpful!
The LED version is good because they are much thinner and don’t get hot, and they have rheostat switches so you can turn the brightness up or down depending on how dark your fabric is.
Best tool for picking out paper stuck in corners is fine point tweezers, NOT a stitch ripper. I have destroyed several perfectly good paper pieced projects because I went a bit too far trying to poke out that last elusive piece.
When you’ve sewn your piece on, flip it over quickly and check on the light box it’s still within the seam allowance. Then flip it back. Crease along the stitch line and fold the paper back, towards the main part. Lay it flat on the cutting mat with the paper edge up and the excess to be trimmed on the right. The paper edge gives you a perfect line to put your quarter inch ruler line against and cut. Press after you’ve trimmed. Again, I’ve chopped off the piece I’ve just sewn on many, many times because I pressed, and then failed to flip it back to trim off the excess.
When you trim your pieces out after they’re assembled, allow yourself an extra 1/16 inch outside the seam allowance. If you’re putting several pieces together, that will get eaten up by ‘fat’ areas where multiple seams meet, and if you don’t have the excess your block will finish slightly too small.
Lastly, never be mean with your pieces. You’ll always end up scant in the place you can least afford it!
Kate, I just recently learned that folding trick on Craftsy… Ahem, and the one about cutting off your added fabric by accident. What really sent me over the edge was the fact that I did it TWICE. (In a row!) 😐 Glad I’m not the only one to do that. 😉
I really enjoy your sharing with me, and can’t wait to see your secret project!
Don’t worry, you’re not alone. Working in reverse – upside down AND back to front – is usually enough to bamboozle even the most expert quilter. I know I’ve sewn fabrics to the front of the foundation paper right at the start more times than I care to count!
FPP is harder than it looks, that’s for sure! Well, at least we know enough to know how to fix it when we break it. 😀
The secret of practice is practising doing it right and you seem to have done that very well. If I practise, I usually end up practising doing it wrong and get depressed.
Trust me, Tom, I did my share of wrong in all this practicing. Did you notice I never showed you the whole of the drunkard’s path table mat? The curved seams were real lulus! But, that won’t stop me; I will try it again soon!
Always something to learn–might as well learn something fun!
Patti, YES!
Good job, keep going, practice eventually becomes proficient.
I certainly hope so, Anita. My little paper pieced project has gone from exciting to blech! Now I will be picking out all my quilted stitches and trying something else that is hopefully better! 😉