I am still with the living and just buried in projects. Until tonight when a friend commented how long it’s been since I posted I hadn’t realized how really long it has been!
One project I would like to share is the videos I have taken on my phone. I have managed to get them to my computer, but need help to get them onto Youtube for posting here. I tried a “free” video software to fix an error I made in a recording of Noodle, but when I got done and posted it there was a HUGE advertising banner right through the middle of it. Cheep shot on their part, I say.
All advice will be cheerfully accepted!
So tonight I was doing my best rendition of “Psycho” on a potato to bake in the oven because I didn’t want a revisit of the exploding potato, as happened in 2014, when suddenly I was shocked to see that my very sharp meat-fork was stuck into my thumb. Yes really. I heard the thud of one tine as it hit the counter, and was told later in urgent care that the bone kept the other tine from protruding right through to the other side. A tetanus shot was administered, pain killers, and antibiotics to prevent infection were prescribed and I was on my way. As we left Bob quipped in the parking lot,
Around Halloween I was spending way to much time on Facebook. I tend to get sucked in when I am depressed. However, all the moping and browsing uncovered a little Youtube gem that I will share with you!
Although the film is listed as a “FAIL”, I believe that with his attitude he is a WINNER in my book!
I watched it and laughed. A good belly laugh which is something I haven’t done in far too long. That old saw “Laughter is the best medicine” is not far from the mark. We need to laugh. A good laugh, or cry, is a catharsis for our system and, I believe, vital to our mental well-being. I shared these golden 16 seconds with Bob and it had the same effect on him.
For several days we could be heard to follow a negative remark or situation with,
“I’m OK!”
These comical outbursts were soon followed by laughter, or at least a smile.
We are grateful for many things we did prior to his loss of work, and this brutally cold and early winter weather:
We ordered broilers for our winter food supply.
I am not happy that they are currently in my living room while waiting for all their feathers to come in, but it is too cold for them in the barn even with heat lamps. I anticipated them being freezer ready before the winter temperatures set in. (I’m OK! 😀 )
We prepaid for our propane this year. We will stay warm and not worry about that mid winter refill.
We are not idle.
We are working on getting projects done both here and up on the Mountain Farmlet. We’ve transplanted our soft fruits, and begun planting the steep slope that is impossible to mow by the cabin.
This slope doesn’t look so bad in the picture but mowing is impossible and weed whacking too strenuous for us at 60+. The wiser move is to plant the slope in native shrubs and ground covers, to hold it in place, and let it keep itself looking good! 😉
While we were there we primed the old well pump and found that it works!
However, in spring we will need to get in there and clean out all the years of moss growing down on the sides and floating on the water’s surface, because it promptly plugged up the spout! 😉
Bob has drawn up plans for the new Chicken Tractor on AutoCad and we have begun construction on it. Those chickies are growing fast and need more room to move! While we work hard we pray for warmer weather so we can send them out to the barn, because even with feathers it is still very cold!
Bob and I carefully measured the lean-to portion of the cabin and Bob once again put his AutoCad skills to work.
He marked door openings, a proposed new wall for between the kitchen and the washroom, a walk-in pantry…
We found room for it in a surprising place!
This entryway room will be divided and the new pantry accessed through this existing opening in the kitchen.
And, of course we will be reusing the original door!
He also added the space for a new door to replace this old hobbit sized model and more!
If you recall, it was the one I told you was 5 ft 4 in tall and that could make a polite lady swear or a grown man cry.
We have the propane man scheduled to come out soon to check our lines, add a line for the stove and turn on our gas. We will be warm while we work on the old farmhouse this winter!
And, during all this flurry of activity, Bob continues to look for work. He went to a promising interview yesterday and now awaits their phone call…
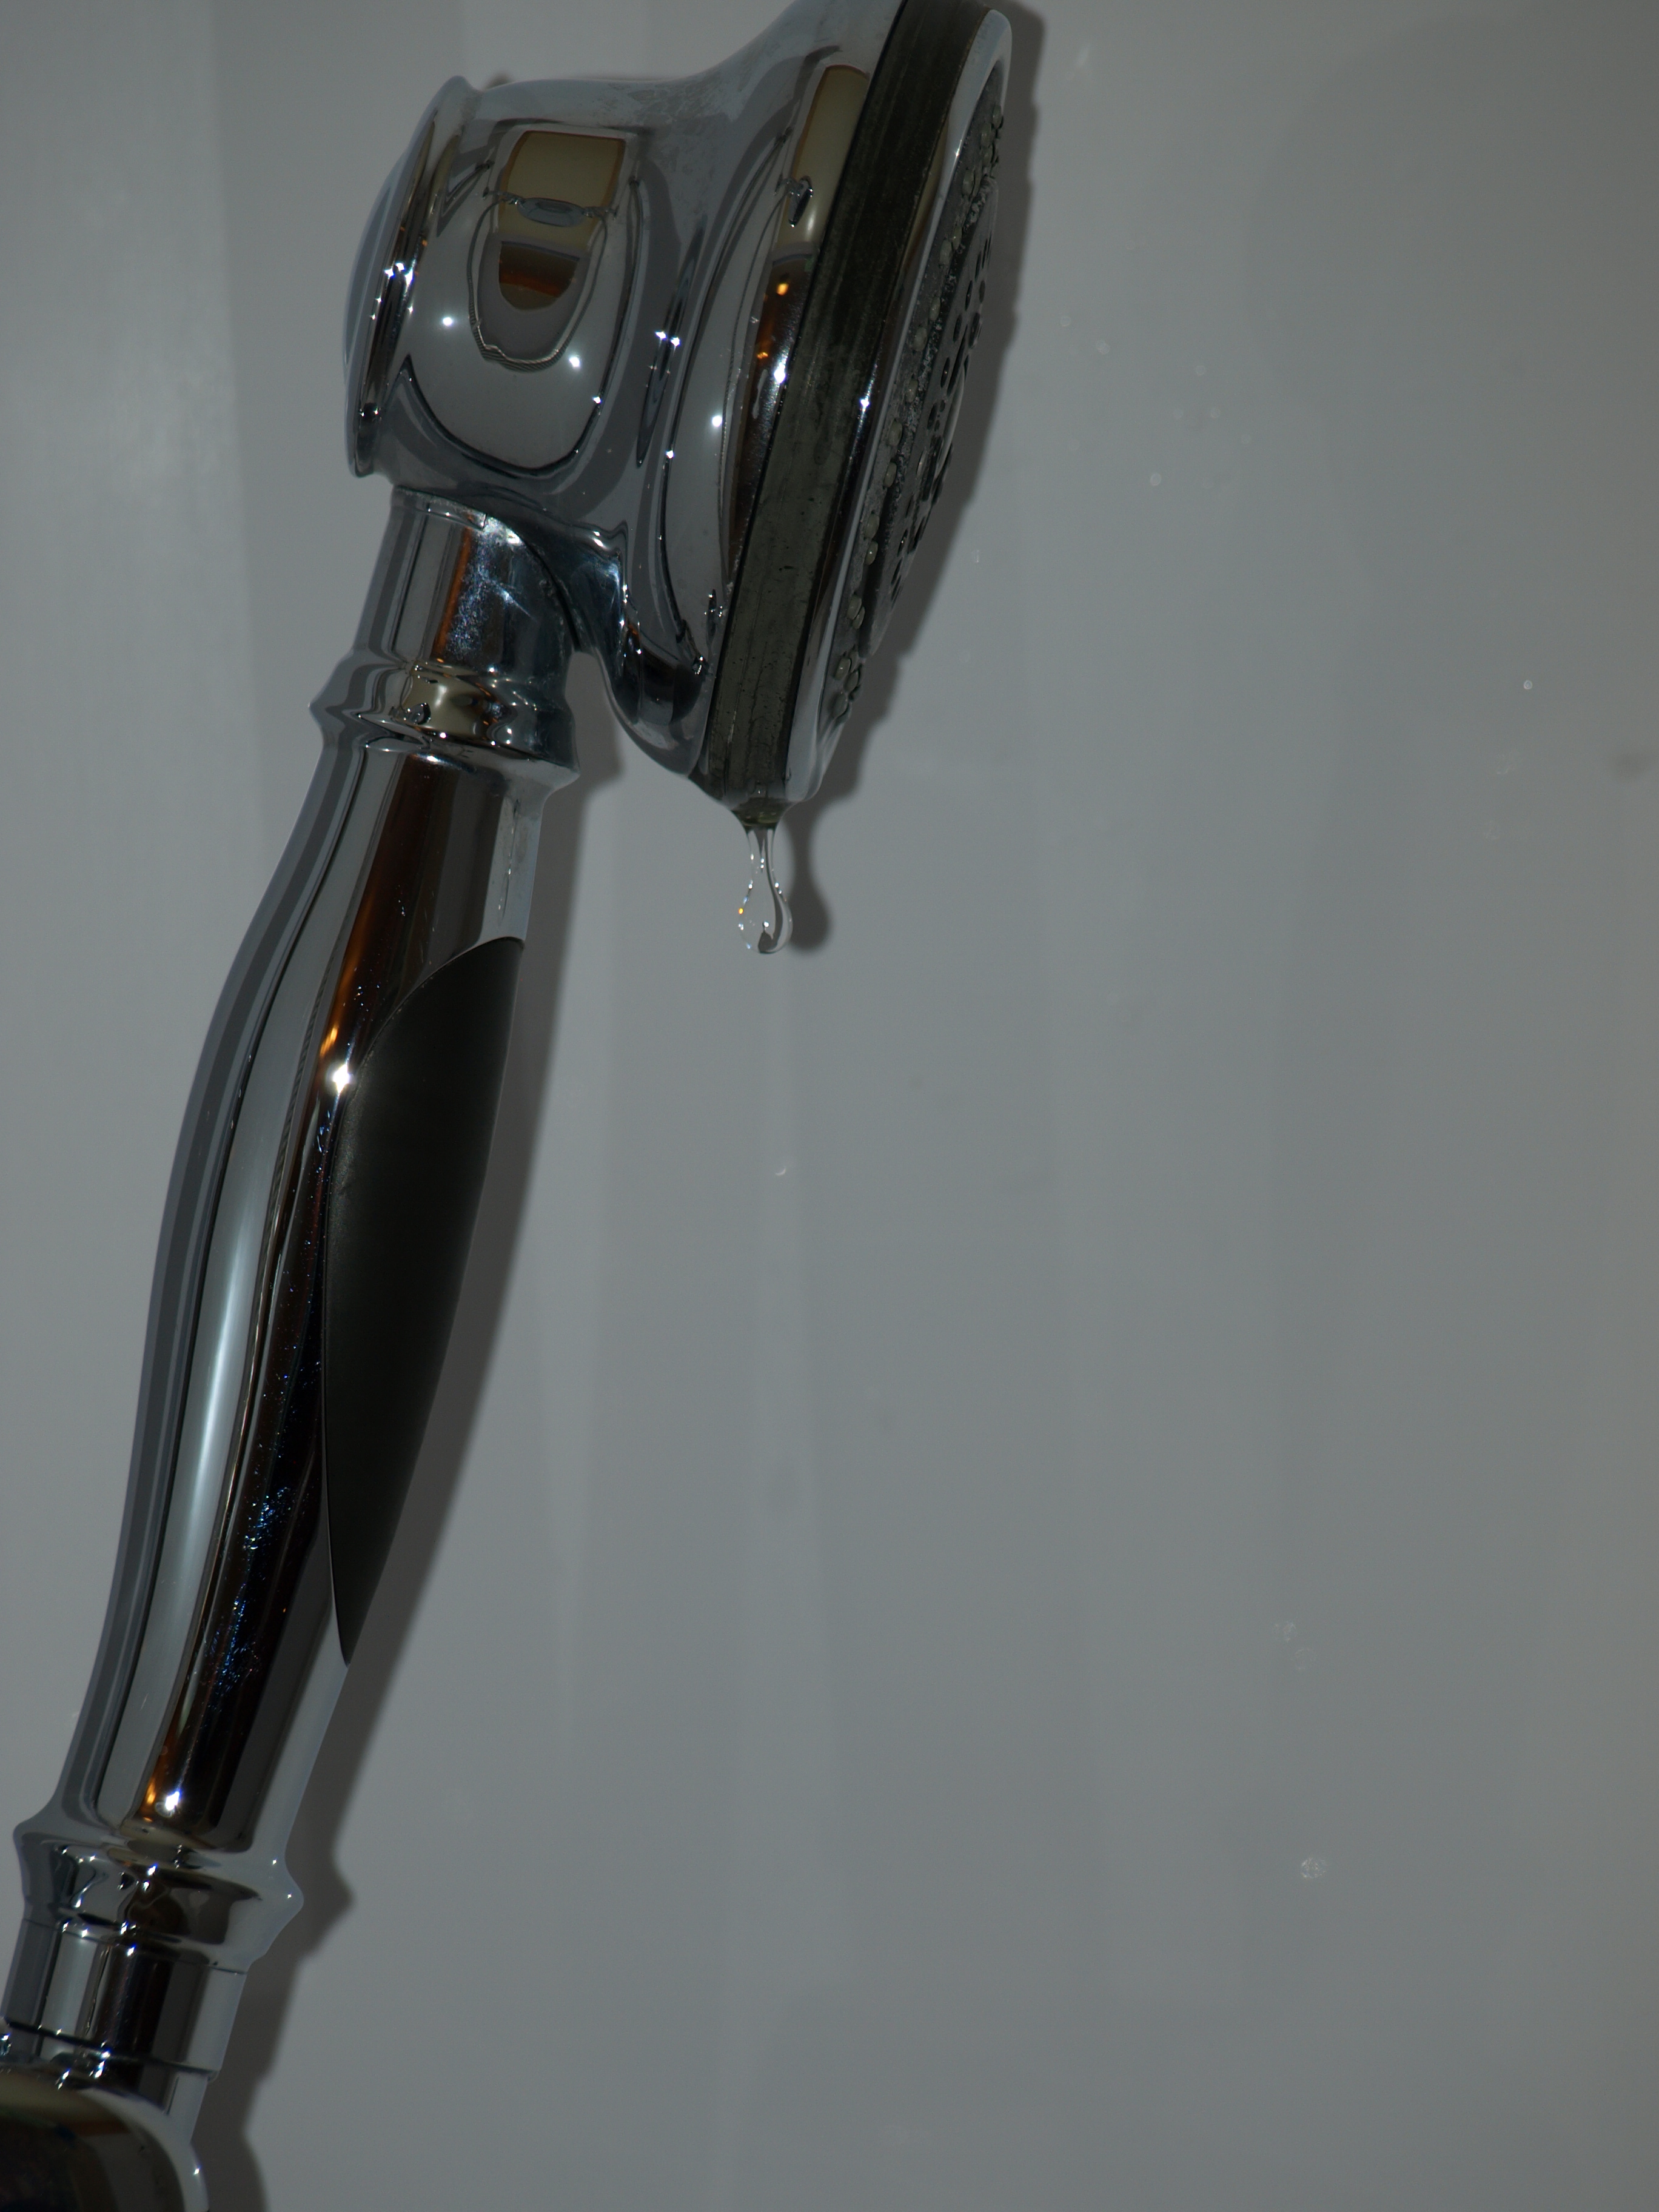
It is nighttime, you have locked the doors and turned out the lights. Teeth brushed, jammies on, you are tired and ready to sleep.
Laying your head back onto the pillow, you pull up the covers and try to relax to sleep. The house is dark, your breathing slows and then you hear it. Sometimes it is in the kitchen, sometimes in your bathroom, but wherever it is you will not sleep until you silence that annoying and rhythmic
drip
drip
drip!
There is simply nothing so annoying as a leaking faucet when you are trying to sleep. You may try several methods to temporarily silence the leak, but sooner or later you will have to call the plumber and that my friends is expensive.
Those of you who have known me for a while know how I feel about paying a repairman to fix appliances. Especially when they want to charge $75 to $80 dollars just to give you their opinion about what may be wrong. Really? I would much rather spend that money on parts and do the job myself.
And so it is that I have challenged myself to fix that crazy making, sleep depriving leaky faucet in the shower! It wasn’t so bad in the beginning, but over time it has become unbearable. I have armed myself with Delta’s and others Youtube videos, gone to the Delta website to find the right part, and spent over $20.00 to buy a strap wrench that I may only ever use once. I know that sounds crazy, but I reasoned that expenditure out like this:
One pair of needle nosed pliers (not indicated in the enclosed instructions, but absolutely necessary to remove the old adapter assembly!)
One [way smaller next time!!!] *new strap wrench.
Following these instructions it was mostly easy.…
Trust me, the enclosed instructions are lacking some steps. If you should want to try this at your home, then watch the video. A couple of times.
The first and most important step in this procedure is to turn off the water to the house, and then open the faucet in the bathroom sink and the shower to release the pressure in the pipes. Now I am ready to begin! 😉
Cap off, remove screw, pull off lever/handle, slip off chromed sleeve, use strap wrench to loosen the valve bonnet nut (TIGHT) remove old valve, and then reverse the process to put it all back together.
Lately it seems that I have been teaching myself to do a lot of things I never thought I could manage. Over the past year I perfected the art of cutting in paint, fixed my dryer and dishwasher, and most recently my washer.
Sometimes when I am working on a new project I have to admit I’ve lost it. In my frustration with the unfamiliar task, I found that I cried, swore, and to my chagrin, even stomped out of the room looking and sounding scary enough to make the dogs run and cower, but I didn’t give up!
Yesterday in my mudroom I stood looking at a week and a half of laundry that included a pile of wet and muddy towels from the recent rain and muddy dogs. I really wanted to just let Bob fix it, but he works all day and I didn’t want to wait. So, I took matters into my own hands and fixed my washing machine.
This was hard.
It required strength, unorthodox tools, and an extra bit of shouting to get the job done. But hey! I fixed my washing machine that two men on the PartsSelect website had said was impossible! So, you just can’t imagine how good I felt!
This morning after reading a friends post I realized that we as women are given all the wrong messages as we grow up. We are taught that some jobs are just not possible to do unless you are a man.
We all have this list of excuses for not trying…
It’s too hard
I don’t know how
I can let my husband/boyfriend do it
I can call the repairman
And I counter…
It might be easier than you think
You can learn
Maybe they don’t know how, don’t have time, or don’t want to
The repairman is expen$ive!
Now you have a choice to make. You can live with the problem or tackle it. What is the worst that can happen? You might find that you really couldn’t do it? Well, in that case you can pick up the phone and call in the professional.
It’s time for us to realize what we are capable of and then go do it! You can find really good instruction for any task or job on Youtube, but beware, some are more brilliant than others, so watch several!
For my task I liked this one best.
A word to the owners of the General Electric Washer (model: WJRE5550H1WW) Life is too short, so BUY THE INSTALLATION TOOL when you order the replacement belt!
Now in my case I had to improvise and adapt the instructions given in this video. If you didn’t purchase the special tool (I should have!) then you will need to do the following to make the job more simple and less dangerous!
Turn off the water, disconnect the power, water hoses and drain tube.
If you didn’t buy the tool, then don’t bother pulling off the front panel. Put down a rug or blanket and lay the front of the machine flat onto the floor. This will allow you enough room to muscle on that belt because you didn’t buy the tool!
Remove the bolts holding the bottom panel. NOTE: the panel will not come all the way off, but you can easily flex it down to get inside. THIS WILL GIVE YOU A LOT MORE ROOM TO MANEUVER!
Now, place the new belt onto the lower shaft.
Pull the belt onto the larger wheel (it won’t go far) and zip tie it into place.
Rotate the wheel a bit further, and feed the belt on. Add another zip tie. I had to add a total of three zip ties.
Now comes the hard part! Keep slowly rotating while watching to make sure the belt does not leave the lower shaft. If it is coming off, then rock the wheel back and forth while forcing the belt back onto the shaft and keeping your fingers out of the works! 😐
Continue slowly turning the wheel and force the belt to stay onto the wheel.
You will now have to snip the first zip tie, rotate, snip the second zip tie, rotate, remove the last zip tie.
Now you will notice that the belt is not fully aligned into the grooves, so slowly turn and push on the belt to get it to align completely with those grooves. (Being completely honest, this is where I found that grunting and swearing helped to relieve the frustration of this task. 😳 )
Replace the bottom panel making sure that there are no leftover screws.
Put the machine into the upright position.
Reconnect the hoses and drain pipe, then turn on the water and plug in the machine.
If necessary, re-level the machine by turning the pegs in front (up or down as needed) I found that tilting the machine back and placing a broom handle under the front was a great assist in this process. 😉
Here comes the easy part. WASH THAT MOUNTAIN OF CLOTHES!
Start with the small stuff and work yourself up to the more detailed and complicated tasks. You’ll never know what you can accomplish if you never try!