My monthly 1857 wedding quilt post is here! I wanted you to see where I am in this needle turned applique adventure.
There are two more blocks from the original that are supposed to be done and they involve building and Mason’s tools, but I am making a couple to my own liking that represent me and my endeavors too. There is a method to my madness, because you see, I want this quilt to fit our queen sized bed when I am done with all this painstaking applique! So the tools will be done later throughout the year. 😉
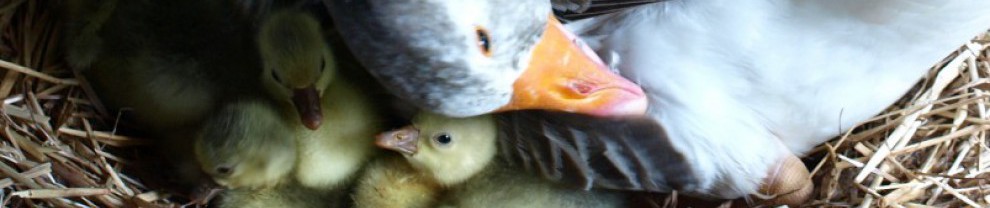
My personal blocks as if you couldn’t guess are the goose, which is Polly, and a representative chicken. These will soon have some outlining added to them for more definition.

That red number with the bazillion red diamonds was a challenge. I almost didn’t finish it, but then I hitched up my big girl panties and took charge of it! Now I am proud to say, “I did it!” 😀
I think a monthly summary of my progress is probably prudent, don’t you? Well, unless I do something truly thrilling and spectacular and then I will not hold back, OK?

Well done, and if the Mad Chicken Lady wants more poultry than dividers ono her quilt, she shall have them!
The tools for woodworking and the Mason’s will come, but I just needed to make it part of me before I went on. 🙂 With each block I do I am so amazed at how much better they come together. And, whenever I may, I will choose fabric from Andover Fabrics for needle turned projects! It rolled and stayed and didn’t fray as much as the Kona and others did. 🙂
Looking good.
Thank you, Tom!
This is going to be really fun to watch develop. And of course the chicken and goose had to be there! I do admire your skills in this area. I don’t really have the inclination to do it myself, but I’m certainly willing to sit around and admire your work!
Linda, I assure you I never knew I had the inclination till just recently. Some of the blocks can be challenging, but I get them done. That red one this month was difficult. I used a divide and conquer method for it. If you can imagine it, I started with compass points, then divided between them, and suddenly found that my remaining diamonds were too large and overlapped! I thought about just leaving it with only half the points in place, but in the end I shaved my templates, pressed the diamonds flat again and then trimmed and reshaped them. Can you tell that every other diamond is just a bit smaller? 😉
Oh, this looks so wonderful!! Thanks for sharing your beautiful progress!
Thank you, Kathee! For a little bit in the beginning I didn’t know if I could do this, then I started using my magnifying ring-light to see the very tiny stitches, and voila! No more blinding eyestrain! Now I am really having fun. 🙂
I greatly admire anyone who can do needle-turn applique. Beautiful work.
Lillian, I have been reading up on the subject, now that I have jumped into it with both feet and no life preserver, and I am learning so much more about how to do this work… lol, instructions make it just too easy! 😉 There are a lot of new tools to aid you in this craft as well. One of the simple things I learned about was milliner’s needles (very fine!) applique pins with ball heads to make them easier to get hold of, and basting your parts in place. Whether you decide on back basting or top basting it is much easier when your parts don’t shift. YouTube can teach you to do any new thing your heart desires to create!
Thank you for cheering me on, it encourages me to keep going.
You amaze me… I could never do that!! 😀
Lori, I have tried several methods from instructions so rigid they make you squeak to absolutely bohemian. I have collected the best from all and think I have landed on a method that works best for me. It’s not as hard as it looks. Now that I am (mostly) caught up I will be doing a bit every day and can finally move on to other things like spring cleaning the house and making more for my Etsy shop. The cupboard is bare over there.
I see that you have been able to make your images “click to enlarge” again. How do you do that? It’s not a problem for me, but suddenly I’ve seen several people who are complaining about not being able to. It seems you have the secret!
I just spent some time trying to sort it out by using the WP media library, and I ened up ready to beat my head against the wall. There’s clearly a trick I’m not seeing. Help!
Linda, I never realized there was a problem until you mentioned it. I checked the new post format and found that there really isn’t a way to make them clickable! You can still get around it by going to WordPress Admin in the menu under My Sites then choose posts NEW. This takes you to the original editor format where you can upload the photo and choose to make it clickable before you add it. MAKE SURE your new post IS EXACTLY THE WAY YOU LIKE IT BEFORE YOU POST it to your blog. Otherwise the new format kicks in and you won’t be able to get back the old editor.
Oh, and the trick is on us. WordPress is becoming less and less robust, and the user who doesn’t upgrade can go to he.. because they don’t care anymore.
Linda, I take that back, you can get to the old editor to fix your post! Follow the directions above with this path change:
get around it by going to WordPress Admin in the menu under My Sites then choose posts and click ALL. Your latest post will be at the top of the list and you when you mouse over it you will have a list of choices pop up; choose edit and voila! You will be magically transported to the old editor. 😀
I’m using the old editor on a regular basis. But what I don’t understand at all is how to make the image clickable. You say I can upload the photo (got that!) and then “choose to make it clickable before I add it.” But how do I do that?
I’ve just spent a half hour trying to figure it out, and I can’t. Say I upload a 1200 x 700 photo, and want it to be 400 x whatever on the blog, clickable to the original 1200 x 700 size. That’s what I’m trying to do.
I’m going to go have another cuppa and make another run at it.
OK, under attachment settings you want to choose to LINK TO Media File In the little window under your choice you should see a URL that reads like this: https://yourfilename.files.wordpress.com/2016/04/yourpicturename
This should work, but let me know. 🙂
Got it! The trick is to insert the full sized image into the gallery, and then choose the large size for the post. It seems as though they ought to have an option for a user-generated size, but that’s ok — I can go into the text editor and change the size there if need be. The large — 470 — really is too big for my theme. But at least I have the basic process down. Many thanks!
Never mind — I found where you can insert a custom size. thanks again!
I’m glad you figured it out, because I misunderstood what you were asking. 😉
What’s so great is that we muddled our way to a good resolution anyway. A little patience and back and forth can accomplish things. 🙂
Yes, we did! 🙂